Eco-friendly Party Serving Ware (+ Adventures in Potato Stamping)

I really, really hate disposable stuff.  I just do.  It really grates on me.  But there are times when it is the only practical option.  Times like Baby Girl’s first birthday party.  For those times, I love that there are some cool new beautiful AND functional eco-friendly options.

Price-wise, all the eco-friendly serving ware ended up being comparable to those commercial theme birthday party options (i.e. Rainbow Brite paper plates, etc.).  Our menu meant we needed a lot of different types of items, and fortunately we have a lot of it leftover for future parties (the kind that won’t have to have a Rainbow Brite, theme).

We purchased nine items from two different companies (VerTerra and Green Paper Products).  Thankfully, everything worked beautifully.  The loveliest items were definitely the VerTerra plates, forks and spoons.  The plates remind me of the Tencel items we carry at Sweet Iris – they are a beautiful and truly eco-friendly option.

IMG_2875

Aren’t they beautiful?  These are actually made from fallen, crushed palm leaves, + steam, heat, and pressure.  That’s it.  They utilize an agricultural waste product that would most often be burned, biodegrade in less than two months after disposal, are completely compostable, don’t transfer heat, maintain shape when in contact with hot substances, and are microwave-safe up to two minutes on high and oven-safe for up to 45 minutes at 350°.  Could you really ask for more?  I don’t think so.

I was truly thrilled with the plates.  Not only were they gorgeous, they worked beautifully–there was no sogginess or weakness at all.  If for some strange reason we used these for a normal dinner at home, I’d try rinsing the plates off and reusing them.  They can’t be put into the dishwasher, but other reviewers have had success with a quick hand wash.  They are just so pretty it feels strange to throw them away.

The plates shown above are the 7 x 8.5 inch.  This size would probably be the minimum size I would choose for an entree course (unless of course you are going gourmet and/or you use nice modest portions).  Remember, there are sloped edges on all of the plates that take away from your useable plate space.  I.e., the 6-inch plates we chose as dessert plates (but barely used as we ended up opting for cupcakes) looked so petite that I almost wonder if they might be an awkward fit for something like a really large slice of a round cake.  Judge for yourself below, where you can see those 6-inch plates below in relation to the cocktail napkins.

DSC00110

You might go with something bigger if you will offer several dessert options.

We really tested the forks out, and I thought they did a great job even with the salad, though I will say that my young nephew had trouble spearing the lettuce and asked for a regular fork.  VerTerra’s website mentions that these forks are “famous for being able to pierce a raw carrot”.  I would believe it–though I think most people would be too worried about breaking a tine to really go for it.  That may have been my nephew’s problem.

You’ll also want to note that the spoons are somewhat shallow.  They worked well for our soup, but if you have a very thin, brothy soup I think they’d be a bit frustrating.  They’d give you no trouble at all with a chili or stew.

We did mess up by not getting knives, though.  Our salad ingredients didn’t get chopped quite finely enough for everyone.  Ah well, next time.

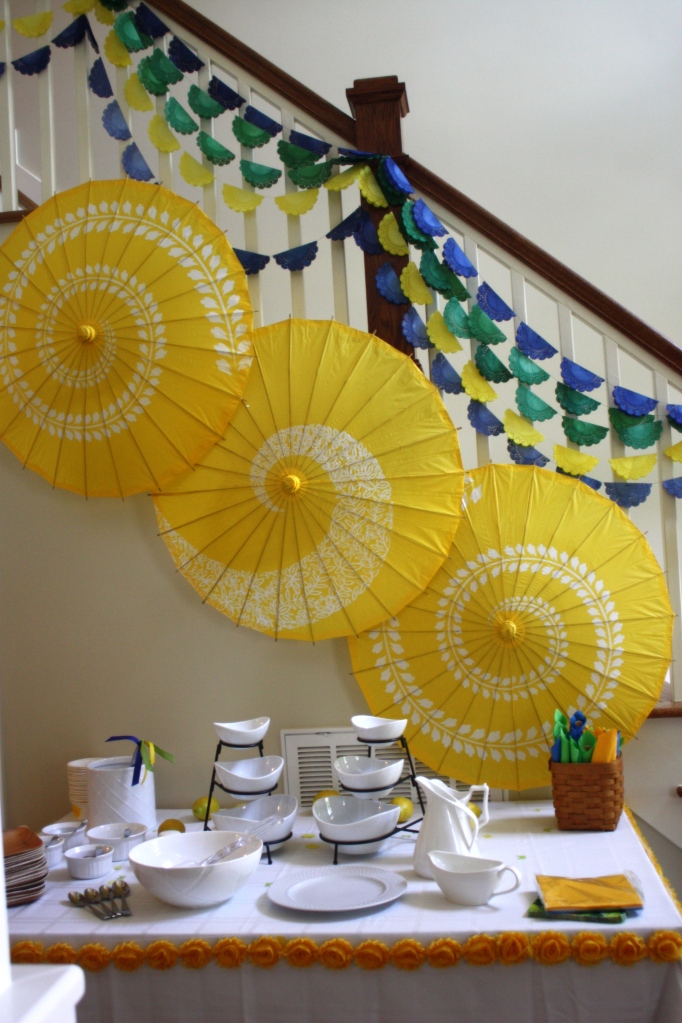
We presented the spoon and fork wrapped in blue, green, and yellow napkins and tied with raffia, in a tall thin basket (shh…it was the bottom section of a facial tissue dispenser basket) because table space was at a premium.  We wanted napkins in all our colors, but didn’t want to be wasteful buying the huge packages offered at most party stores.  Fortunately, I swung into Dollar General’s party section while on a box-of-Corn-Pops run.  3 packs of napkins, $3.  Score.

IMG_2840

We also bought greenpaperproducts.com punch cups, drink cups,  4 oz. portion cups and wooden tasting spoons.  The cups were all made from Polylactic Acid, or PLA, a biodegradable and compostable bioresin derived from corn.  According to their website, PLA uses 65% less energy than producing conventional plastics, generates 68% fewer greenhouse gasses, and contains no toxins.  

You can see the 4 oz. portion cups and tasting spoons below, filled with my new love, lemon-basil sherbet.  I didn’t find any of the cups to be so thin that they smash in your hand, as some other eco-friendly products can do.

Lemon-Basil Sherbet

Lemon-Basil Sherbet

Liven up your Disposable Ware (etc.) with a Potato Stamp

We also chose these biodegradeable, compostable, renewable sugarcane barreled soup bowls and were very happy with them also–the size was perfect, they didn’t get too hot, and they weren’t too floppy.  We  partied them up using a potato stamp and a tube of yellow paint:

IMG_2845

Festive, right?  If you’re like me , it’s been a decade or two since you’ve tried your hand at a potato stamp.  My tip – keep your design extremely simple, and if you are working with a rounded surface, keep your design small.  This was a surprisingly time-consuming project for me, as it was difficult to get the large lemon design we chose to print clearly and evenly on the rounded surface–I had to keep tweaking my stamps.   In sum, you’ll want to do as I say, not as I do.  🙂

To potato stamp all you need to do is draw your design outline on your potato-half with a pencil and cut away the outside, leaving a quarter-inch-or-so tall raised design.  I could draw a decent looking lemon freehand with a pencil, but if you need a more symmetrical design, you can push a cookie cutter into your potato half, then use a paring knife to slice through the potato until your knife hits the cutter.  Even with the precision of a cookie cutter, I don’t think that potato stamping lends itself to a flawless, professional look (am I wrong here? If so, comment below), but if a more hand-crafted look works with your decor (as it did with our “painted” napkin-inspired party), give it a try.

Hope that helps!  If you want to see the deliciousness that landed on so many different products, click here for our menu.

Not-too-Sweet Yellow Party Punch

This punch is close to crossing the line between a drink and a punch: it’s not nearly as sweet as most punches can be.  This would look beautiful served with blueberries, lemon, or orange slices frozen in a smaller portion of the punch (minus the ginger ale).

Yellow Punch

Ingredients:

2 (6 oz.) cans frozen orange juice concentrate

2 (6 oz.) cans frozen lemonade concentrate

1 (46 oz.) can pineapple juice

2 quarts water

1 (2 liter) bottle ginger ale

Preparation:

Combine all juices and water. Chill.  Add ginger ale when ready to serve.

Lemonade Cupcakes with Homemade Cream Cheese Frosting

Lemonade Cupcakes with Cream Cheese frosting

Lemonade Cupcakes with Cream Cheese frosting

I loved the light, fluffy flavor of these cupcakes.  They were a nice change of pace from the ordinary cupcake texture–almost like a cross between a pound cake and an angel food cake–in a very good way.  We used Duncan Hines white cake mix.  This recipe would make a great regular cake as well.  This is another Southern Living recipe.  I have altered the original instructions: pour the batter into the cupcake pan until it is almost full, not 3/4 full as the original states.  We found that the cupcakes barely rose at all.  This will change your yield to roughly 21 cupcakes.

Frosting:  the original recipe goes for an easy, semi-homemade approach using a canned cream cheese frosting and assorted colorful candies for topping.  However, semi-homemade cupcake batter was about as far as we were willing to trod down the easy-path.  We did try a canned frosting to save time for testing purposes only, but we can testify that the unbalanced, sugary taste  of the canned stuff definitely detracts from an otherwise great recipe.  Take the time to make the homemade stuff.

You don’t need a ton of frosting with this cupcake.  We even managed to get a pretty presentation without any kind of cake-decorating skill required.  We simply used the largest round tip we had and iced in a spiral, then topped each cupcake with three blueberries and dusted with lemon zest.  I loved that the zest added color and flavor without all the artificial coloring.  It’s a great alternative to sprinkles.Sometimes my spirals didn’t turn out perfectly; but when finished with the blueberries and lemon zest the mistakes almost disappeared.  Magical!  The blueberries and zest were added for looks, but I was surprised by the wonderful impact they had on the flavor.  It really brought the whole thing together.

Lemonade Cupcakes

Ingredients:

1 (6-ounce) can frozen lemonade concentrate, thawed

1 (18.25-ounce) package white cake mix

1 (8-ounce) carton sour cream

1 (3-ounce) package cream cheese, softened

3 large eggs

Preparation:

Remove 2 tablespoons lemonade concentrate from can, and reserve for another use.

Combine remaining concentrate, cake mix, and next 3 ingredients in a mixing bowl. Beat at low speed with an electric mixer until moistened. Beat at high speed 3 minutes, stopping to scrape down sides. Spoon batter into 30 paper-lined muffin cups, filling each almost full.

Bake at 350° for 22 minutes or until a wooden pick inserted in center comes out clean. Cool in pans on a wire rack 5 minutes. Remove cupcakes from pans; cool completely on wire rack.  Serve with homemade cream cheese frosting.

Homemade Cream Cheese frosting

Instructions:

1 (8 oz.) package of cream cheese

1 stick butter

1 box powdered sugar

1 tsp. genuine vanilla

Preparations:

Beat cream cheese and butter.  Add sugar a little at a time, creaming after each addition.  Add vanilla,

Lemon-Basil Sherbet

I know what you are thinking.  “Basil???…Sherbet???”  But trust me, this is lovely.  This may be my favorite recipe from my daughter’s first birthday party.

It was wonderfully light, summery, and fresh with a very subtle basil flavor.  This would make a gorgeous little palate-cleansing entremets if you were planning a truly luscious dinner party.  We used it as a simple taste-of-something-sweet after lunch, but before the real dessert, lemonade cupcakes, was served.

I found this recipe over at Baking Obsession, where you’ll also find a beautiful (but a bit labor intensive) presentation idea: serving in a lemon-half.

This recipe freezes perfectly, so feel free to make this several days in advance of your event.  That’ll give you more time to scoop out lemons and find itty-bitty basil leaves for garnish.  😉

Lemon-Basil Sherbet

Ingredients:

A large bunch of basil (leaves weight – 30 g)

1 cup granulated sugar

½ cup fresh lemon juice (from about 3 lemons)

2 2/3 cup whole milk

Grated zest of 2 medium organic lemons

Preparation:

Tear the basil leaves roughly. Put the leaves and sugar into a medium bowl. With your fingers massage the leaves with sugar to release the basil aroma. Add the lemon juice to the bowl, stir, cover, and let stand for an hour.

Stir the milk into the lemon juice mixture. Strain through a fine sieve into another bowl or a large liquid-measuring cup, pressing lightly on the basil leaves. Add the lemon zest. Chill for about 4 hours. Process in an ice cream maker. If there’s any lemon zest accumulated on the dasher, scrape it and stir it back into the sherbet with a fork. Serve the sherbet soft right from the ice cream maker or transfer into an airtight container and transfer to the freezer to firm up (at least 3 to 4 hours) before serving.

30-minute Yeast Rolls

 We didn’t get any pictures of these gorgeous, tasty rolls, but here is one from Your Home Based Mom, who got the recipe from here.

I did not name this recipe, so don’t worry about recipe-transcription mistakes when you notice that the times listed don’t really add up to 30 minutes.  Do the math and know that this is still super-fast for a yeast roll recipe.

Just don’t do like we did, and accidentally leave the pan in the oven too long trying to warm them up. An entire pan of yeast rolls was sacrificed, and that is a sin.

30 Minute Yeast Rolls

Ingredients:

1 cup plus 2 Tbsp warm water

1/3 cup oil

2 Tbsp yeast

1/4 cup sugar

1 1/2 tsp salt

1 egg

3 1/2 cups bread flour (seems to work better but all purpose flour will also work)

Preparation:

Heat oven to 400 degrees.

In your mixer bowl combine the water, oil, yeast and sugar and allow it to rest for 15 minutes. Using your dough hook, mix in the salt, egg and flour.

Knead with hook until will incorporated and dough is soft and smooth. (Just a few minutes)

Form dough into 12 balls and then place in a greased 9 x 13 pan and allow to rest for 10 minutes. Bake for 10 minutes at 400 degrees or until golden brown.

Honey Mustard Dressing

This is a very good Southern Living recipe.  You can also do the basil infusion trick here to be able to make the recipe further in advance and be able to store the leftovers longer.

Honey Mustard Salad Dressing

Ingredients:

1 cup mayonnaise

3 tablespoons yellow mustard

3 tablespoons honey

2 tablespoons chopped fresh basil

2 tablespoons vegetable oil

2 teaspoons cider vinegar

1/2 teaspoon minced garlic

1/4 teaspoon ground red pepper

Preparation:

Whisk together all ingredients; cover and chill at least 4 hours.

Citrus-Basil Vinaigrette

Here is another of my favorite recipes from my daughter’s first birthday party.  We needed to get this made in advance, so we made only one small adjustment to the recipe: rather than chopping our basil, we placed the basil leaf whole in the dressing, and allowed it to infuse.  If you choose this method, you’ll want to give it at least eight hours to infuse before removing your basil (no straining required).   You can adjust this recipe to use with any kind of citrus.  Try it with a red orange or red grapefruit.  We happened to have champagne vinegar handy; you can use a white wine vinegar if you prefer.   This has a pretty yellow color and would look lovely served in a cut crystal cruet.

Citrus-Basil Vinaigrette

Ingredients:

1/4 cup olive oil

2 Tbsp. orange juice

1 Tbsp.  lemon juice

1/4 lemon, zested

1/2 tsp. salt

1 Tbsp.  honey

1/8 cup chopped fresh basil, or whole basil leaves

1 tsp. champagne vinegar or white wine vinegar

Preparation:

In a jar with a lid, mix the olive oil, orange juice, lemon juice, lemon zest, salt, honey, basil, and vinegar.  Seal and shake well.  Chill 2 hours in the refrigerator if you chop your basil, 8 hours for whole leaves.  Strain chopped basil or remove leaves before serving.

Doesn’t Get Easier Grilled Chicken

In the midst of all the craziness one of the last things to get done was a really good recipe for our grilled chicken.  We were getting desperate.  After tasting another Weber seasoning (Garlic and herb) we have used and loved in the Reel household, my mom picked up Weber’s Zesty Lemon.  At that point, with three very busy days to go before the party and no chicken recipe picked out, she gave the prepared seasoning a go, and was duly impressed. The incredibly easy chicken “recipe” we ended up with was so delicious you’d think it involved actual work!

Doesn't Get Easier Grilled Chicken and Spring Mix Salad

Doesn’t Get Easier Grilled Chicken and Spring Mix Salad

Amazingly, this simple rub gave the chicken a lot of flavor, even in just four short hours.  The chicken didn’t really scream lemon; instead, it had a very well rounded, summery, and fresh taste with subtle lemon flavor.    It would also be delicious on salmon.

Doesn’t Get Easier Grilled Chicken

Ingredients:

Boneless skinless chicken breasts

Weber Zesty Lemon seasoning

Preparation:

At least four hours before grilling very lightly score your chicken, only on the fattest area of the breast.  Sprinkle with lemon seasoning.  Refrigerate four hours.   Grill, being careful not to overcook.  Allow the chicken to rest for five minutes before slicing.

Serve with salad, if desired, and citrus-basil vinaigrette.

Sweet Corn and Cilantro Soup

This nice summer soup is a modified version of a spicier, vegetarian version created by Naturally Ella.

For best results, you’ll want to get your hands on some really good, fresh sweet corn.  Check out Ella’s fantastic idea for cutting your kernels off the cob:

Some of our recipe modifications simply served to make the soup more yellow to fit into our party theme  (when tested as written it was definitely orange).  For example, we used a yellow pepper rather than a red, and a vidalia onion instead of a red onion.  If I were making this at home, I’d definitely revert to Ella’s original plan on those two points.

Sweet Corn and Cilantro soup

Sweet Corn and Cilantro soup

The serrano pepper in the original recipe also contributed to the soup’s orange look, though it was removed from our version primarily because it added a tremendous amount of spice(!!!) to the soup, and that wouldn’t work well for most of our guest list.  For the party, we also removed the jalapeño seeds, which completely changes the recipe so it is no longer spicy at all.  At home I’d probably kick it up just a notch either by adding a bit more seeded jalapeño, or including some of the seeds.

We sautéed our vegetables in bacon drippings to give a subtle depth of flavor, and used chicken broth rather than vegetable broth.

One final suggestion: you might tread carefully with your lime. Without the spicy peppers, the lime came through a touch stronger than we’d like, so consider adding it slowly and tasting along the way.  Enjoy!

Sweet Corn and Cilantro Soup

Ingredients:

4 ears sweet corn

3-4 jalapeños (seeds removed)

1 medium red (or yellow) pepper

1/2 medium red (or vidalia) onion

1 Tbsp. bacon grease

2-3 cups chicken broth

1-2 Tbsp. fresh lime juice, to taste

3/4 tsp. salt

1/4 cup minced cilantro + extra for garnish

1/2 cup heavy cream

1 avocado

crumbled bacon and dried crushed red pepper (optional toppings)

Preparation:

In a medium pot, heat bacon grease over medium heat.  Dice onion and peppers.  Add to pot.  Cook until onion is translucent, 4-5 minutes.

Remove corn from cob and add to cooked peppers/onion mixture.  Continue to cook for 2-3 more minutes.  Stir in 2 cups of chicken broth and salt, bring to a boil and reduce to a simmer.  Let cook for 15-20 minutes.

Remove from heat and using either an immersion blender or regular blender, puree soup.  Return to heat and stir in cilantro, heavy cream, and more veggie broth if needed.  Heat for 1-2 minutes over medium low.  Taste and add more salt if needed.

To serve, slice avocados and add to top of soup.  Sprinkle with cilantro and other toppings as desired.

Yellow, Blue and Green Lemon theme party – Menu

 So if you read our previous post, you know everything you ever wanted to know about dyed doilies, paper lanterns, and use-what-you’ve-got centerpieces. The thing you didn’t get a peak at: the main attraction for our many out of town (even out of state!) guests–the food!

We’ve had quite a few barbecue/hamburger/hotdog outdoor parties lately, and we needed a change since many of the same people would be coming to the same place at the same time as they had just a month or so before.  So for my daughter’s birthday party, we decided to tackle serving a summery soup and salad to the multitude, and keeping the party inside with the exception of a bit of overflow seating.

We went a bit crazy with our theme, (albeit a rather loose theme: lemons with a yellow, blue and green color scheme) and even chose food that fit.  A lot of recipes were tested.  Some outstanding contenders just didn’t make the cut (sorry lovely gourmet Lemon-Blueberry layer cake.  Au revoir neat Pioneer Woman salad).  Here’s what did make it:

Menu

(click for recipes)

Sweet Corn and Cilantro Soup

Doesn’t Get Easier Grilled Chicken and Spring Mix Salad

Citrus-Basil Vinaigrette

Honey Mustard Dressing

Hidden Valley Ranch Dressing (made from a packet)

30-minute yeast rolls

Lemon-Basil sorbet

Lemonade cupcake with homemade Cream Cheese frosting

Not-Too-Sweet Yellow punch

Logistics of serving soup and salad at a party

Tip #1: Pick a space and “prettify” it

Let’s face it.  A kitchen isn’t the prettiest place for a buffet line at a birthday party.  But if you’re not having an outdoor party, and you actually need to sit people at your dining table, your options narrow down pretty fast.

If you need to serve from your kitchen, here is a pretty idea:

These ruffled crepe streamers would also look pretty under kitchen cabinets:

As nice as these options are, we really needed to use the kitchen as a food prep workspace, not a showcase.  So we eeked out space in the entryway, using a console table with an expanding top as our primary buffet space, an antique washstand at the base of the stairs for dessert, a card table tucked by the front door for water and punch, and coolers with other drinks on the porch.

DSC00110

Tip #2 : Traffic flow is everything

Wherever you put your self-serve line, if you have a small, narrow space, you’ve got to do anything you can to help with traffic flow.  If you can keep your different serving areas even slightly separated, it will significantly reduce your guests’ blood pressure.

In our case, we had the guests start at the soup side of the table and continue in a straight line towards the drinks.  We made the soup accessible only from the side of our console table, and the salad only from the front.  Guests that needed to grab yeast rolls and utensils stepped around the corner to the other end of the table, before continuing onto the card table by the door where the punch and water servers were located, or to the coolers with more drink options just outside.  Between these small efforts and guests exercising general southern hospitality, everyone got their food surprisingly quickly and easily.

 Tip #3: Get creative and use what you’ve got to save space and keep food hot (or cold)

We had to fit seventeen different foods on our console table–plus plates, bowls, napkins, and utensils.

IMG_2840

It took some creativity, but we made everything fit, through the use of some unique (ok, odd) serving pieces.  We used a flour canister to serve our soup. It was tall and narrow enough to keep a large quantity of soup hot, and didn’t require all the room that a traditional soup tureen and lid would need.  I had a bowl of soup 30 minutes after it was added to the canister, and it was still wonderfully warm.

Sweet Corn and Cilantro soup

Sweet Corn and Cilantro soup

Victory!

We also needed something tall and relatively narrow to hold the utensils (you can’t see it, in these pictures, but a giant pan of yeast rolls took up all the room on that side of the table), so we recruited the bottom of a facial tissue dispenser basket.  Finally, without a vinegar cruet (or three), we turned to two large creamers and a gravy boat to serve our three salad dressings.

Doesn't Get Easier Grilled Chicken and Spring Mix Salad

Doesn’t Get Easier Grilled Chicken and Spring Mix Salad

We had  some more traditional serving pieces too, like the two B. Smith tiered bowl sets (from Bed, Bath and Beyond).  These affordable servers kept the food in easy reach–even for kids, and add a bit of height for a much prettier table-scape.  My mom and I each own one of the the tiered sets above (aww, they’re friends!) as well as several other B. Smith serveware pieces.   Though most of the B. Smith pieces aren’t as space-saving as these stacked bowl sets, we love the vertical element and the way they dress up even simple foods.

Other than posting the recipes, I’ll also have one more quick post to tell you about the gorgeous eco-friendly, compostable plates (made from crushed leaves!), bowls (made from sugarcane–and dressed up with a potato stamp) cups, and utensils we used.